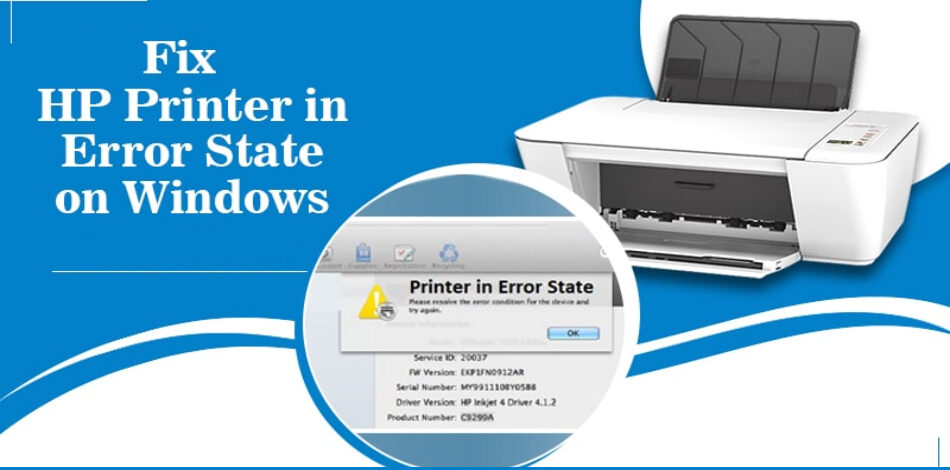
HP printers are well known for their advanced features and competitive prices. Users are experiencing technical issues with their HP printer units due to the sophisticated features. The most frequent issue experienced by HP printer consumers is “HP Printer in Error State“.
The most frequent causes of an HP printer problem are a hot printer unit, a bad connection, a corrupted file in the printer spooler, a paper jam, etc. Here are several simple and dependable fixes for the HP printer unit’s error status issue.
Troubleshooting HP Printer in Error State Problem
In This Article
Power Cycle devices

Long-term usage of the printer might overheat the hardware, which will result in a sudden failure of the equipment. By following the instructions, users can allow the printer to cool down and perform a power cycle:-
- Switch off the printing device.
- From the power source, disconnect the power cable.
- Switch off the computer.
- Turn on the computer once a minimum of 30 seconds have passed.
- Lastly, Turn on the printer after plugging in the power cord.
Check the printer for out-of-paper errors

In case, there is no paper in the paper tray, the printer will show an out-of-paper error. Users can use the instructions provided to resolve the printer out-of-paper problem:-
- Switch off the printer
- Place the papers in the printer’s paper tray by finding them.
- Turn the printer on.
- Test the print page on the printer.
Check the printer for paper jams
The most frequent causes of printer paper jams include incorrect paper loading, damaged rollers, and usage of inferior paper, and cartridges. A paper jam can occur during printing if a little piece of paper becomes stuck in the rollers. The following method can be used by users to unclog the paper.
- Firstly, Users can unclog paper jams in the automatic document feeder, output tray, and external input tray (paper tray).
- Remove the power cable from the printer and turn it off.
- Remove the ink cartridges from the front panel by opening them.
- If there is any paper stuck, remove it.
- Look for a small piece of torn paper in the rollers.
- For a small piece of paper, users can utilize pincers.
- Take another end of the paper sheet out carefully if the entire paper sheet is stuck inside the printer.
- If necessary, remove every piece of paper from the paper tray.
- Remove any stuck paper by opening the printer’s rear access door.
Running routine printer cleaning cycles is an excellent idea to prevent paper jam problems.
Check the ink level of the ink cartridges:

Replace your ink cartridges when your HP printer starts producing faded prints. More ink is used when printing HTML documents or graphics than when printing text. In some printers, low ink levels can clog the print head and put the machine in an error condition. Here are the steps for checking the ink levels in printer cartridges:-
- Firstly, Select the Windows or Start button.
- Access Settings.
- Then, Choose Devices > Printers from the menu.
- After that, Double-click the icon for your HP printer.
- The status box will show the ink levels.
If the ink level is low, users should replace the ink cartridges right away.
Ensure the correct installation of ink cartridges:
The HP Printer may experience errors if ink cartridges are not installed correctly. The user installed a black cartridge many times in place of the color ink cartridge and a color cartridge in place of the black cartridge. Also, The printer may stop functioning as a result and enter an error status.
Customers can follow the instructions provided here to install ink cartridges correctly:-
- Initially, Switch on the printer
- As seen below, move the paper width guide to its outermost setting.
- After that, load the paper and adjust the paper width guide to the right side.
- Activate the front panel.
- Next, Remove the outdated black and color ink cartridges.
- The new ink cartridges’ plastic covering film should be removed.
- The new ink cartridge should slide into the slots.
- Lastly, Snap the front panel shut.
Instead of replacing ink cartridges, users opt to replenish them. Ink cartridge refilling is economical and promotes environmental preservation. However, customers can only refill the cartridges a total of five times. The user must then replace the ink cartridge to prevent an HP Printer error from occurring.
Troubleshooting Steps

On a computer system, users can run printer troubleshooters. This will resolve and resolve any internal technical issues with the printer device. Here are instructions for troubleshooting the HP printer.
- Firstly, open the Control Panel
- Then, visit Devices and Printers
- After that, right-click on the HP printer to bring up the context menu, and choose Troubleshoot.
- After that, Windows will detect and fix printer issues on its own.
Reinstall HP Printer Device:
Corrupted driver files and missing installation files can both cause printer errors. To fix the HP Printer Error State issue in these circumstances, a new installation of the HP printer is required. The instructions listed here can be used by users to reinstall their HP printer:-
- Firstly, Remove the printer’s USB cable from the PC.
- Click the Start button to access Settings.
- Select Apps in the Settings panel.
- Find the HP printer application and select the Uninstall button.
- Restart your PC and HP printer.
- Utilize a USB cable or a network to connect an HP printer to a PC.
- Lastly, It will automatically find a new device after connecting. Install an HP printer by following the directions on-screen.
Run an antivirus on the PC:
If the computer is infected with malware, spyware, or a virus, the printer’s functionalities could experience an issue and stop working altogether. By following the instructions provided below, users can rapidly run antivirus scans:-
- First of all, Launch the system’s installed antivirus application.
- Choose a thorough scan from the Scan menu.
- On the Scan Now button, click.
The scanning process will take a while. To guard against dangers and malware, one should utilize powerful antivirus software.
Thereafter, are the simple fixes for the HP Printer Error State. Users are welcome to contact us if they run into any other problems. Our customer service representatives are available to consumers around the clock.
Solutions to Fix HP Printer Errors in One Place State
If the printer and computer are unable to communicate, users may see the message “HP printer is in error state.” Users can make use of the suggestions in this article on How to Fix HP Printer In Error State Windows 10 & 11.
How to Fix HP Printer Error State on Windows 10 & 11
Update the port Settings
Users can use the following instructions to adjust the COM and LPT port settings.
- First of all, To launch the Run dialogue box, use the Windows key + R.
- Enter devmgmt.msc into the text box after typing it there.
- Then, Open Device Manager and select the View tab from the navigation bar.
- From the context menu, choose Show Hidden Devices.
- To access the properties menu, use right-clicks on the ports (COM & LPT).
- Select Use Any Interrupt from the Port Settings menu.
- Enable legacy Plug & Play detection by checking the box.
- Lastly, Rebooting your computer is as simple as clicking the “OK” button.
Check if your HP Printer is online
The offline condition of the printer may be the cause of the HP printer issue. Users can use the procedure below to connect their HP printer to the internet.
- First of all, Click on Start then Control Panel.
- Then, Choose Printers and Devices.
- By selecting its name in the list, you can figure out the condition of your printer.
- Lastly, Right-click and choose the option to “Use printer online” if the printer is currently offline.
The user can then connect their printer to the internet and check for messages indicating that the printer is having problems.